How to Add a Contributor to Your Domain Name
As a business owner, you may want to share access to your domain name with other team members or collaborators. Whether you’re giving a web designer access to make updates, a marketing manager access to domain settings, or a developer access to DNS configurations, adding a user or contributor to your domain registrar account is a straightforward process. Here’s how to do it.
GoDaddy (full article)
- Go to your GoDaddy Delegate Access page. You might be prompted to sign in.
- In the People who can access my account section, select Invite to Access.
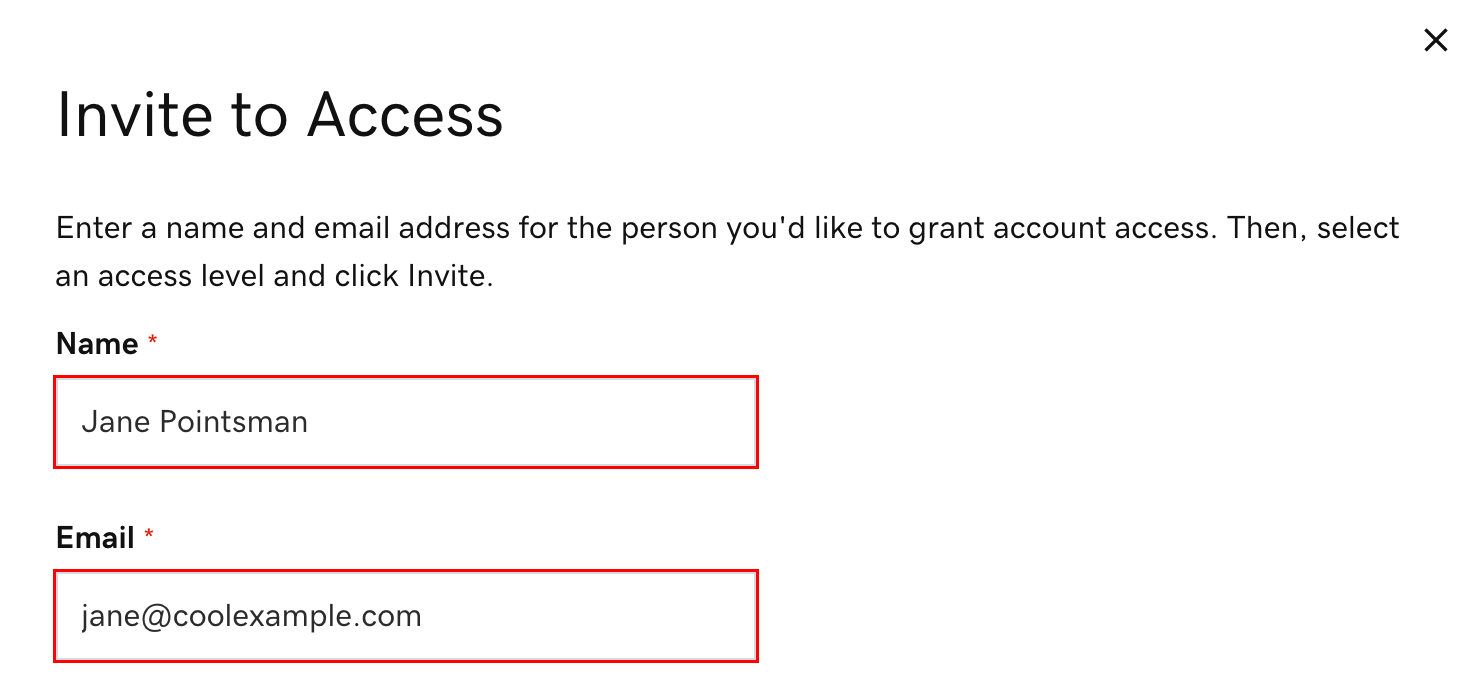
- Enter the Name and Email address for the person you’re inviting.
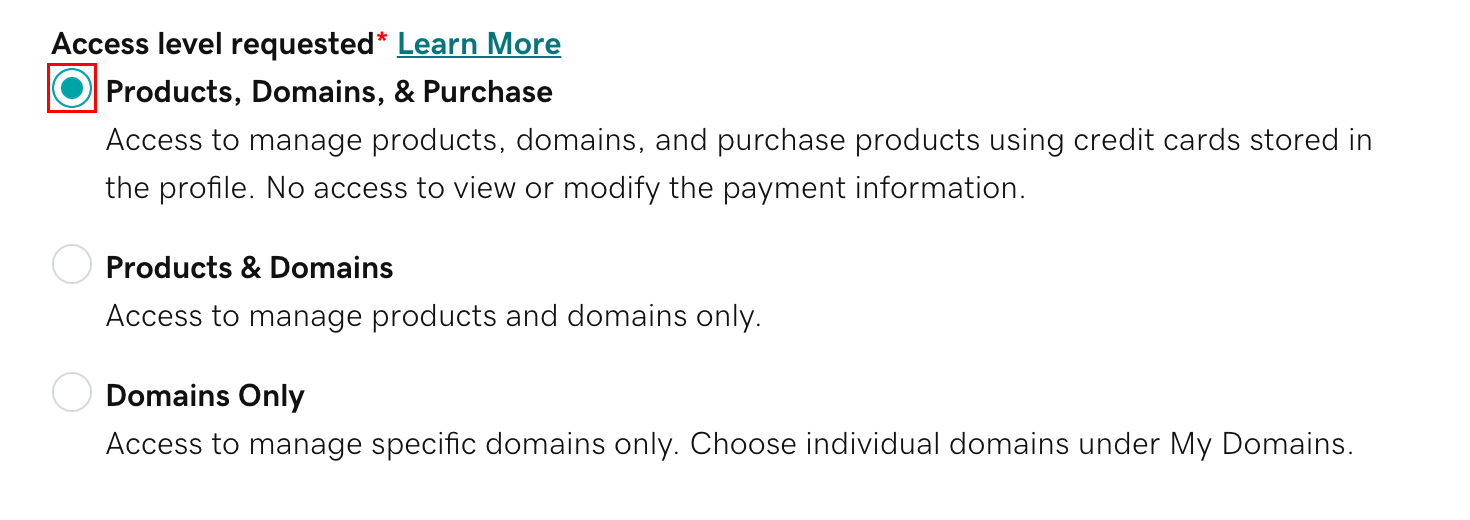
- Select one of the access levels. If you’re not sure what this means, read an explanation of access levels.
- Select Invite. GoDaddy will send the person an email invitation to access your account. Once the person accepts, you will be notified.
Namecheap (full article)
- Sign into your Namecheap account (The Sign In option is available in the header of the page).
- Select Domain List from the left sidebar and click on the Manage option in front of the domain name you would like to share access for:
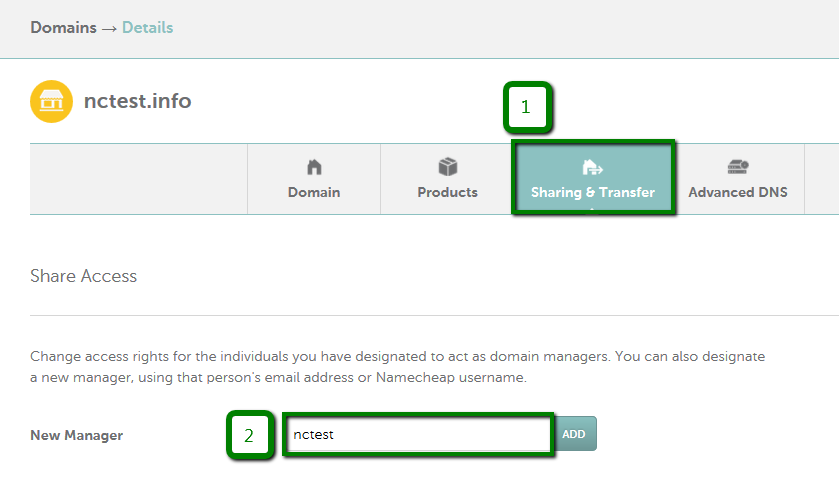
- Choose the Sharing & Transfer tab from the top menu and find the Share Access section. Simply input the new manager’s email address or Namecheap username into the New Manager field and click Add:
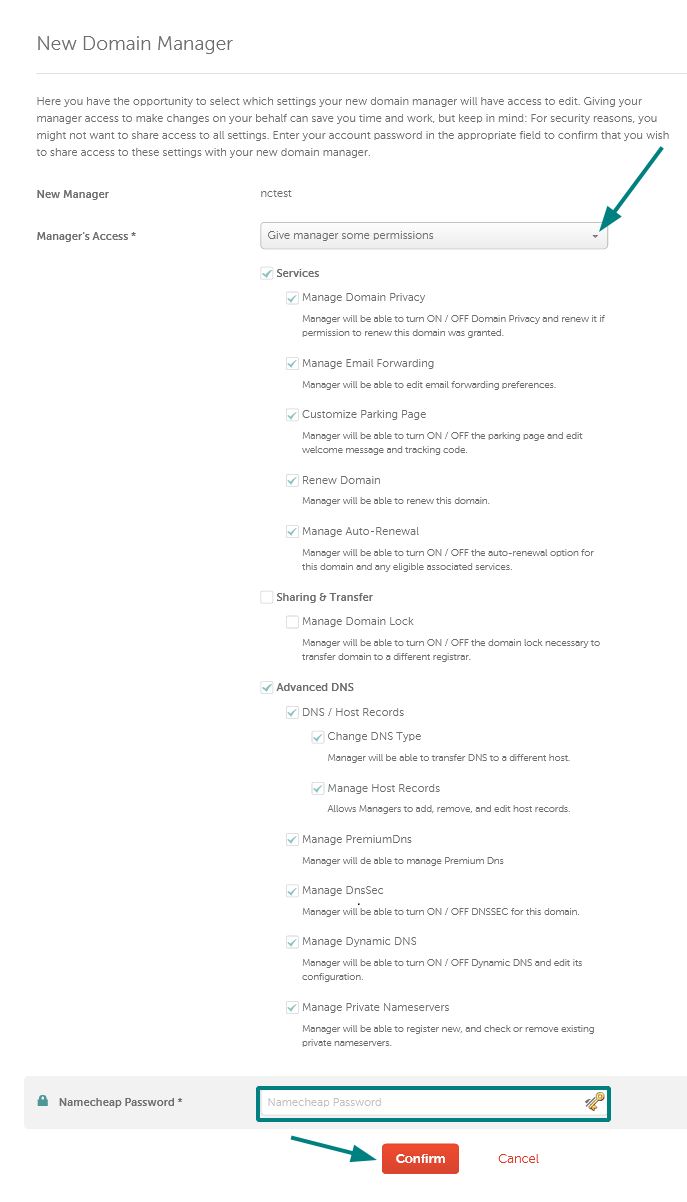
- Here you can select the settings your new manager will have access to edit. Giving your manager access to make changes on your behalf can save you time, but keep in mind that for security reasons, it is not reasonable to share access to all the settings. Enter your account password in the appropriate field to confirm that you wish to share access to these settings with your new domain manager:
All Other Domain Registrars
Step 1: Log into Your Registrar Account
Start by logging into your domain registrar account. This is the service where you purchased your domain name, such as Cloudflare, Porkbun, Namesilo, or many others. Ensure you have the necessary login credentials.
Step 2: Locate Your Domain Management Area
Once you’re logged in, navigate to the section where your domains are listed. It may be labeled “My Domains,” “Domain Management,” or something similar. Click on the domain name you want to add a user to.
Step 3: Access User Permissions
Look for a settings or security section where you can manage user access. This may be labeled “Account Settings,” “Manage Users,” or “Permissions.” Some registrars allow you to create specific roles, such as “Admin,” “Contributor,” or “Viewer,” each with varying levels of access.
Step 4: Add a New User
Click the option to add a new user or contributor. You’ll need to enter the person’s email address and assign their role. Make sure to select the appropriate level of access based on what they need (e.g., full admin access or limited contributor access).
Step 5: Save and Notify the User
Once you’ve entered the user details, save the changes. The new user will typically receive an email invitation to create their own login credentials if they don’t already have access. They’ll be able to access the domain with the permissions you’ve granted.
By following these simple steps, you can efficiently manage who has access to your domain and ensure that your team can make necessary updates without compromising security.
Some links contained in this article may be affiliate links, where we earn commission for referred customers. Chimento Agency only provides affiliate links to the companies and services we firmly believe are the absolute best options for our own clients.


